


Mindfulness is a trending topic lately, have you noticed? This past year has shaken a lot of lives, and in some moments it has been challenging to feel present. In stressful situations, calmness is our friend. When we remain calm, our energy is conserved and it is easier to stay in the moment of mindfulness. Moms we need to conserve our energy- we need every last ounce to keep up with everything motherhood entails!
Something that has worked for my kids as well as myself in times of feeling anxious or frazzled, is a “calm-down jar”. You can buy many different variations of jars that are ready to go and those are great for when you need a long timeout. I know I should have come to you with this tool about a year ago, but better late than never, right? If you need a minute or two of a breather, then I have an incredibly easy, two-ingredient jar you can make right now!
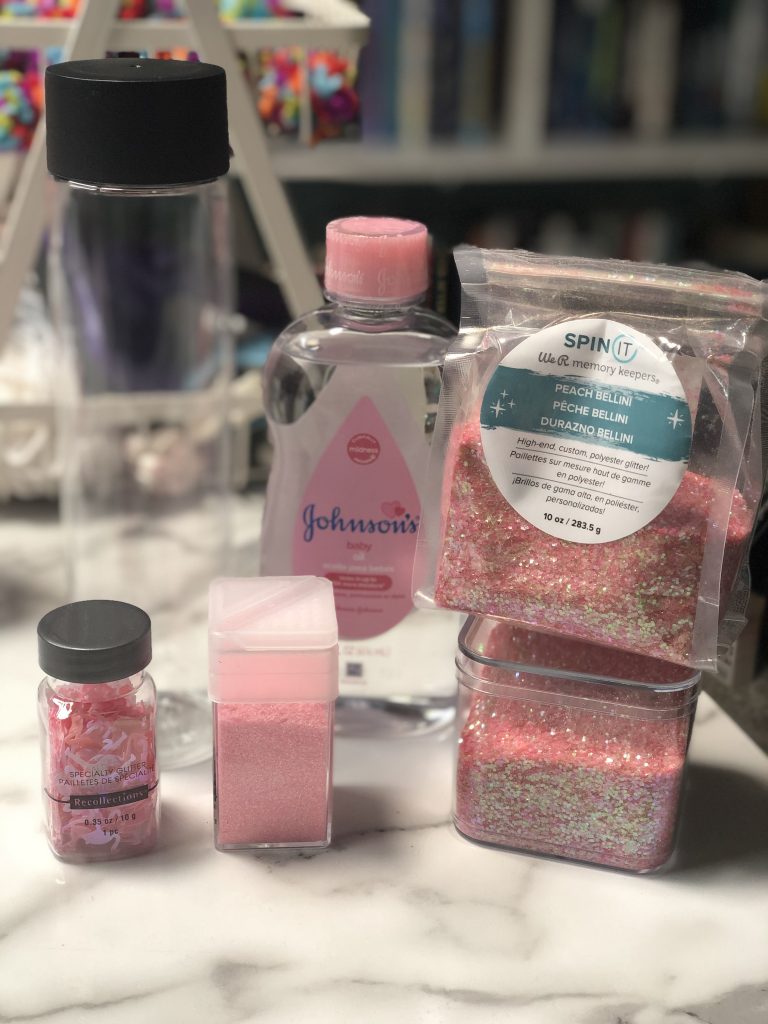
Collect Mindfulness Jar Supplies:
-
- A plastic jar or container. The best jars I’ve found are ones in the dollar section at Michaels or the Voss Water bottles. Having the flat top is really nice because it gives your bottle a flat surface to sit on either end. (You can definitely use glass, but if you are using this as a kid craft, plastic might be your best bet.) If you are recycling a water bottle, the inside needs to be totally dry otherwise your glitter might clump up and not float so well. I also know that you can find small plastic tubes that fit in your purse and that would be a neat thing to have to pull out when kids are getting cranky in a store or in the car.
- Choose your glitter! There are so many glitter options out there, just visit the craft section at your favorite store and you will see. What glitter you use will change how things float and settle in your bottle. I like to use a combination of fine to medium glitter — fine glitter will take longer to settle in your bottle, so using a combination makes it look cooler. I’ve had a lot of success with the Creatology brand glitter, it’s a great price for the amount you get, it comes in shaker bottles or pourable tubes.
- Also, different colors will look different in the light as they float, so picking very light colors won’t be so vibrant for example. I’ve made several bottles and I have found that heavier glitter, like the really chunky or fun shapes, doesn’t work really great. It’s OK to have a few larger pieces, but if you are hoping they’ll stay suspended in the liquid for a while, you’ll likely be disappointed. The great thing about this is that you can make these for a relatively low cost so if you don’t like your first bottle, you can empty it and start over.
- Baby oil. I know you’ll find a wide variety of ideas on Pinterest but the easiest, tried and true liquid for me to use has been baby oil.
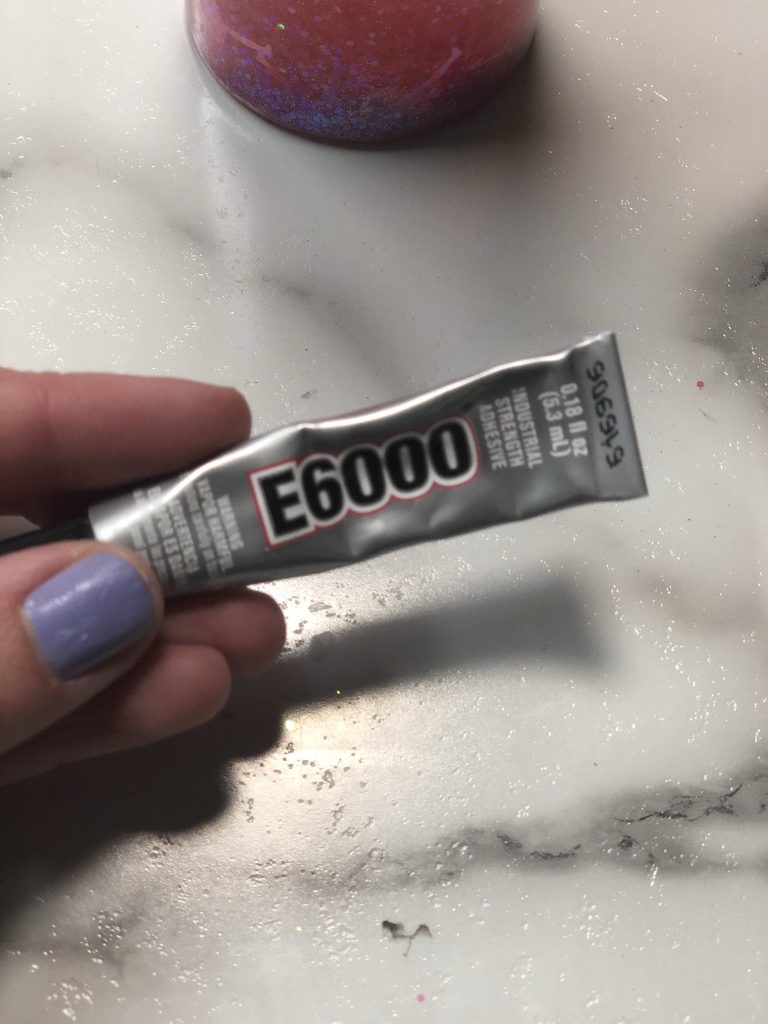
- Strong adhesive. Funny story: I once glued someone’s butt to a wooden chair with E6000 and I can tell you it works relatively quickly and it does a fantastic job. (Don’t worry, everyone came out unharmed and our live art piece was a hit. Even if his mom didn’t think it was so funny.) You have to glue the top on really well, so I recommend something strong like E6000, found at Walmart and Michaels. I know some people have used hot glue, but I just haven’t had success with that long term. I almost always use E6000 for craft projects requiring major hold.
- Optional tools: depending on how wide your bottle opening is, you might want a funnel to get the glitter and oil into the bottle with little to no mess. I have also saved a scoop from a baby formula container to scoop glitter, but you can also use small spoons, which might be easier for little hands.
Let’s get crafting our mindfulness jar!
All you have to do is fill your bottle with as much (or as little) glitter as you want. I usually fill about a quarter to a half-inch of the bottle at most. I find with dark glitter colors a quarter inch is enough, with light glitter colors a half-inch is best.
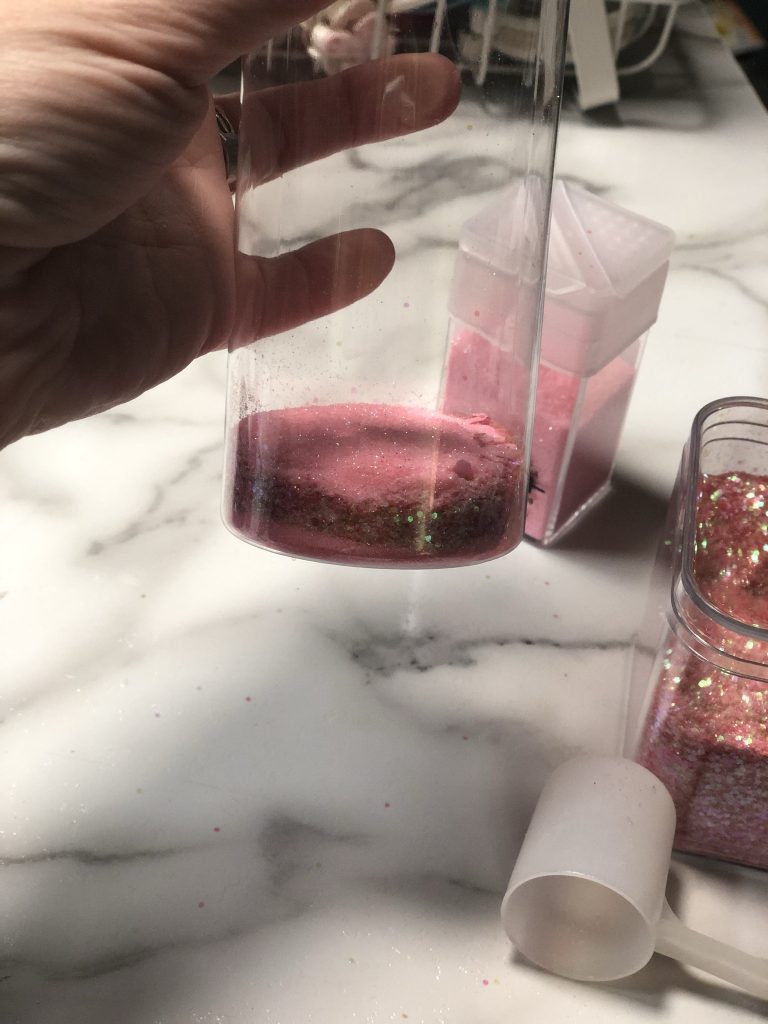
Once you’ve put your glitter in, fill the bottle as close to the top as absolutely possible with the baby oil. At this point you don’t want to see empty space in the bottle, once you tip your bottle upside down, you’ll see a little air gap and that’s OK.
After filling the bottle, glue that cap on tight — glue everywhere you can! We don’t want to run the risk of any baby oil and glitter leaking out. I usually glue a solid ring around the inside of my lid, on the bottle, literally everywhere. Kids are notorious for leaving a bottle on its side, dropping it, you name it- you really don’t want this to open up.
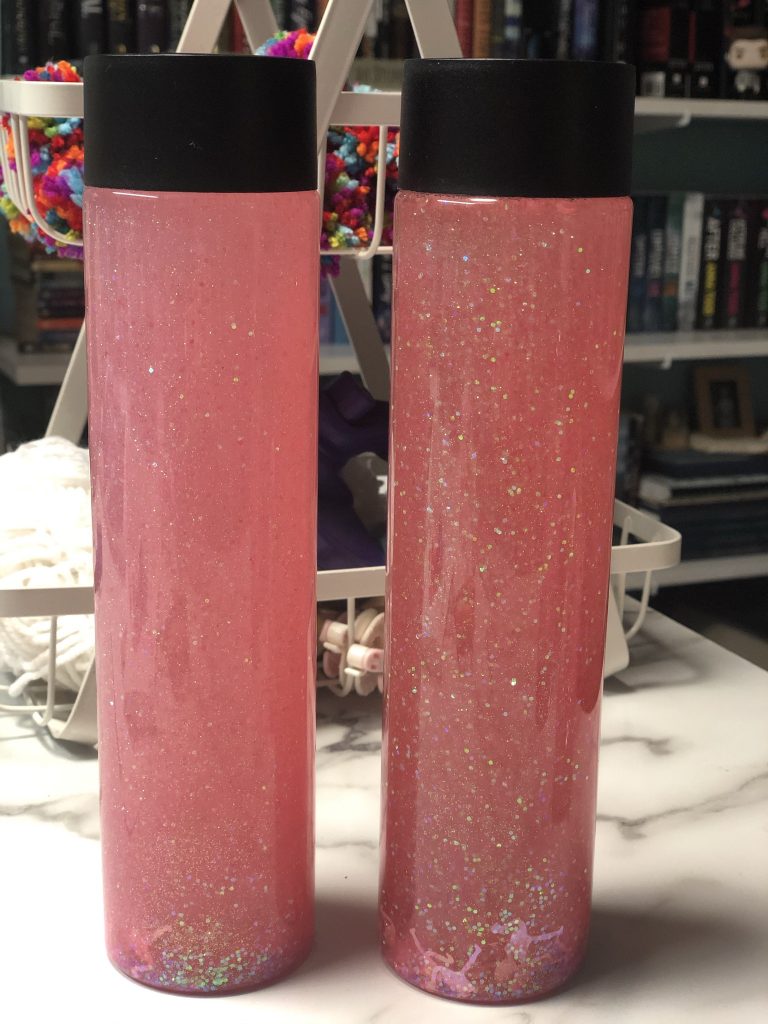
That’s it! It really is the easiest craft! You can use permanent markers to decorate with designs or your child’s name if you want. I have a couple of these jars on my desk and I randomly shake them up and take deep breaths as a mindfulness reset throughout the day. I’ve used them as calm down jars, but we’ve used them as timers, too! Shake it up and have kids speed clean a room as much as they can until the glitter is all settled.
If you make a “calm-down” jar, share a picture on Instagram by tagging @duluthmoms! We’re always interested in seeing what others create.


